⚡ Electronics Arduino Course, Circuits Design, Innovative Learning Environments, Programming, Testing, implementation with TinkerCAD 💡🥼👷♀️STEM & English Education 🎓Masterclass for Students & Teachers
- Description
- Curriculum
- Reviews
Welcome to the Arduino and Tinkercad Circuit Design, Programming, and Implementation course! In this course, you will learn the fundamentals of circuit design and programming with Arduino, as well as how to use Tinkercad to design and simulate circuits. You will also have the opportunity to work on hands-on projects and exercises to apply your knowledge and skills.

Arduino is a popular open-source platform for building electronics projects. It allows users to program and control a variety of devices, from simple circuits to complex robots and IoT systems. In this course, you will learn how to use Arduino to create interactive and educational projects. You will learn about programming, electronics, and engineering principles, as well as how to use sensors, actuators, and communication protocols to interact with the physical world.

The benefits of learning Arduino in education are numerous. It helps students develop skills in problem-solving, critical thinking, and creativity, as well as introduces them to careers in STEM fields. It also provides a fun and engaging way for students to learn about technology and how it can be used to make a positive impact in the world.
🎓 Teachers can also benefit from learning Arduino. It provides a hands-on way to teach a variety of subjects, from computer science to physics and math. It also gives teachers the tools to create engaging lesson plans and activities that can be customized to fit the needs of their students.
By the end of this course, you will be able to:
- Understand the principles of circuit design and how to use Tinkercad to design and simulate circuits
- Program Arduino microcontrollers to control hardware
- Implement circuit designs using Arduino and electronic components
- Troubleshoot and debug circuit designs
🔬🎨 STEAM Education💡Ideas, 🥼 Activities, 🥽 Interactive Simulations & LABs, and resources for 🎓Educators
Our lesson plans feature a variety of 💡 ideas and 🥼 activities for learners to explore and learn, interactive 🥽 simulations/virtual labs that allow for hands-on, visual learning, projects, and case studies that will allow learners to apply the concepts and skills learned in a practical setting to help learners understand and retain information. They can also be used as a supplement to traditional classroom instruction, allowing learners to delve deeper into concepts at their own pace.
The 🔬🎨 STEAM activities are designed to help learners develop creative and artistic skills, as well as 🧐Critical Thinking, ❓ Problem-Solving, 🤝 Collaboration & Teamwork, 📢 Communication skills, and using 🧰 Tools. For example, learners might be asked to create drawings, paintings, or sculptures inspired by the objects and events they learn about in the lesson, write stories/posts about their experiences, and create music or other creative content inspired by the themes of the course. They’ll encourage learners to think about the connections between different subjects and how they can be used to solve real-world problems and create new innovations.
For educators, we offer 🎓 resources including lesson plans and extra materials to help integrate the course content into the classrooms and maximize their educational value. The goal is to provide interactive and engaging content that assists students in learning and comprehending important STEM concepts, as well as valuable resources for educators.
⚡ Arduino Circuits Design and Coding Course outline in short
- Introduction to Arduino and Tinkercad: Overview of Arduino and Tinkercad. Setting up the Arduino development environment. Introduction to the Tinkercad Circuit simulator.
- Circuit Design: Introduction to circuit design principles. Using Tinkercad to design and simulate circuits. Working with common electronic components (e.g. resistors, capacitors, transistors). Using Tinkercad to design and simulate circuits. Building and testing circuits using Arduino and electronic components. Debugging and troubleshooting circuit designs
- Programming: Introduction to programming with Arduino and the IDE. Setting up and programming an Arduino microcontroller. Using Arduino libraries and functions to control hardware
- Advanced Topics: Working with sensors and actuators. Using Arduino to control motors and servos. Advanced programming techniques with Arduino (e.g. interrupts, timers) and more
Throughout the course, you will have the opportunity to work on hands-on projects and exercises to apply your knowledge and skills. These could include creating simple circuits with Tinkercad, programming Arduino microcontrollers to control hardware, and implementing more complex circuit designs.

👉 Join our Discord C4S Server to ask questions, share progress and learn & engage with others
-
1
 🟢👉 SKS Online Course guide, tips, and emojis meaning list
Start from here, with our online course guide, tips, and emojis meaning list
-
2
 🆕⚡🎧 History of electronics and its applications
The history of electronics is a fascinating subject that provides insight into the evolution of modern technology. Electronics can be defined as the study of how electrical signals are processed, controlled, and communicated. The term “electronics” comes from the word “electron,” which refers to the subatomic particle with a negative charge that is responsible for the flow of electricity.
-
3
👩🔬🎓🔬🧵⚡💡 The maker movement in Education STEM STEAM
In recent years, the maker movement has gained popularity in education as a way to engage students in hands-on, project-based learning. One of the key benefits of the maker movement in education is that it encourages students to take an active role in the learning process. By giving students the opportunity to design, build, and test their own creations, the maker movement helps to foster a sense of agency and ownership over their learning. This approach to education can be particularly effective for students who may struggle with more traditional forms of instruction.
-
4
💼👨🎓🛠️🧵⚡🎧 Tinkering and the maker movement: Learning is an active process
In this lesson, we will be exploring the benefits of tinkering and the maker movement as a way of learning. We will discuss how tinkering and making encourage individuals to take an active role in their own learning, fostering a sense of curiosity and a desire to learn more. We will also talk about how tinkering and making can be a great way to learn about different subjects and concepts in a more hands-on and interactive way.
-
5
💼👨🎓🛠️⚡🎧 The (Italian) Arduino revolution
The Arduino revolution, named after the Italian company Arduino, refers to the widespread adoption and use of Arduino microcontrollers in a variety of fields, including robotics, computer science, and the Internet of Things (IoT). Arduino microcontrollers are small, inexpensive computer boards that can be programmed to control various electronic devices, such as sensors, motors, and LEDs.
-
6
⚡🎧 Arduino, how does it work, components, IDE 2 Tutorial (Integrated Development Environment)
Arduino is an open-source platform used for building electronics projects. It consists of hardware (a microcontroller board) and software (a programming environment). The Arduino platform was designed to make it easy for anyone to get started with electronics and programming, regardless of their previous experience.
-
7
⚡🎧🥼 Choose the right Arduino Student Kit to start and an example project
An Arduino student kit is a great way to get started with electronics and programming. By considering your goals, evaluating the components, and considering the price, you can choose the right kit for your needs. With an Arduino student kit, you can learn about basic electronics concepts, build a wide variety of projects, and develop the skills you need to become an electronics and programming enthusiast.
-
8
📐🎲🎧 Introduction to TinkerCAD and how to sign up for Students and 🎓Teachers
To get started with TinkerCAD and 3D printing, you will need to sign up for a TinkerCAD account and create a new design. From there, you can use the various 3D shapes and tools available in TinkerCAD to create and customize your object. You can manipulate the size, shape, and appearance of your object using the various controls and options in TinkerCAD.
-
9
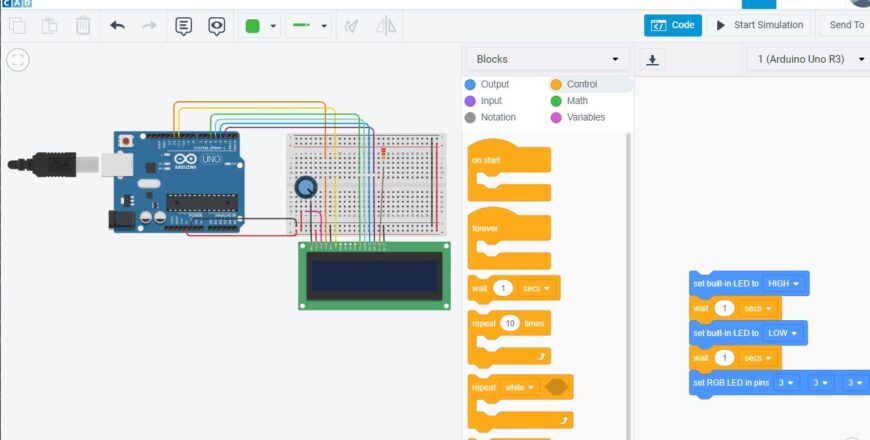
📐🎲⚡ Tinkercad Circuits Design for simulating and testing electronic circuits and Arduino projects
TinkerCAD Circuit Design is a powerful online tool that allows users to create and test electronic circuits. It is a great tool for those who are new to circuit design, as it has an intuitive interface and a wide range of pre-designed components that can be easily added to the circuit. It is also a useful tool for experienced designers looking to create more complex circuits. Here is a lesson on using TinkerCAD Circuit Design:
-
10
📐🎲🔑 TinkerCAD Glossary and ⌨ Keyboard Shortcuts
Some common terms you might encounter when using TinkerCAD and Keyboard shortcuts to access common tools and features in Tinkercad
-
11
📐🎲🎧 TinkerCAD Community Gallery for 3D Designs, Circuits and Codeblocks
The Tinkercad Community Gallery is a platform where users can share and discover 3D designs created using the Tinkercad platform and is a great resource for finding inspiration, learning new techniques, and sharing your own designs with the community.
-
12
📐🎲🧵🎓🎧 How to Use Tinkercad for PBL Project-based Learning
In this lesson, we will cover how to use Tinkercad to design project-based units that rev up student engagement, inquiry, creativity, and innovation. We will also discuss how to increase access for all learners using principles of Universal Design for Learning (UDL) and how to address standards through interdisciplinary activities. Additionally, we will explore ways to assess student work in PBL and how to publish student work, with or without a 3D printer. Finally, we will provide some resources for increasing your Tinkercad skills and doing PBL with Tinkercad.
-
13
📐🎲🎧📱 TinkerCAD iPad app and Augmented Reality 3D
TinkerCAD is a free, easy-to-use 3D design and modeling tool that is available as a web application and as an app for the iPad. It is a great tool for beginners to learn 3D modeling, as well as for more experienced designers looking to quickly create and test out ideas.
https://youtu.be/qrk_BRLnseU
-
14
👾💡👉 Join our Open Discord Server to share your progress, engage with other and peer review your activities
Join us on our open server to share your progress and ask questions, engage and have fun with others and receive feedback. On the server, there are specific channels for each topic, where you can share your content and read what other members and course authors have posted. This is a great way to connect with others with the same passions and learn from each other's experiences and insights.
-
15
💻 Introduction to the C programming language used by Arduino
-
16
💻 Understanding Arduino sketches and their structure
An Arduino sketch is a program written in the C programming language that is used to control an Arduino board. Arduino sketches are typically used to interact with sensors, displays, and other external devices, and can be used to build a wide variety of projects, from simple blinking LEDs to more complex systems.
-
17
💻 Working with variables and data types in Arduino
Variables are an important concept in programming, as they allow you to store and manipulate data in your programs. In Arduino programming, you can use variables to store values of different data types, such as integers, floating point numbers, characters, and strings.
-
18
💻 Using loops and control structures
In this lesson, we will be learning about two important programming concepts that will help us write more efficient and flexible code for our Arduino projects. Loops are a fundamental programming construct that allows us to repeat a block of code a certain number of times. This can be useful for tasks that need to be performed multiple times, such as reading sensor data or controlling an output. There are several types of loops that we can use in Arduino, including for loops, while loops, and do-while loops.
-
19
💻 Making Functions to reuse code and make your program more organized and readable
In Arduino programming, functions are blocks of code that can be called by a name and can accept parameters and return a value. Functions allow you to reuse code and make your program more organized and readable.
-
20
💻 Debugging and troubleshooting techniques in Arduino and TinkerCAD
Debugging and troubleshooting are important skills for any programmer to have, as they allow you to identify and fix problems in your code. In Arduino programming and TinkerCAD, there are several techniques that you can use to find and fix errors in your code.
-
21
🆕🔌⚡ Basic concepts of electricity and electronics
Electricity and electronics are important fields that are fundamental to many areas of science and technology, and understanding these basic concepts is important for designing and implementing electrical and electronic systems.
-
22
🍎🔌⚡💡🥽 LAB: Ohm’s Law – Circuits Current Resistance Voltage
Ohm's Law is an interactive simulation that allows users to explore the concept of electric potential and electric current, and how they are related through Ohm's law. The simulation includes several different modules, each of which focuses on a specific aspect of electricity.
-
23
🍎🔌⚡ Electric Current, Alessandro volta voltaic cells, resistance, ohms law, equation for voltage, ampere and James watt power
In this lesson, we will explore the concept of electric current and how it works. We will also learn about some of the key figures and ideas in the field of electricity, including Alessandro Volta, James Watt, and Ohm's law. We will also discuss the properties of materials and how they relate to their ability to conduct electricity. By the end of this lesson, you should have a good understanding of electric current and be able to apply this knowledge to a range of practical situations.
-
24
🍎🔌⚡💡🥽 LAB: Static Electricity
Static Electricity LAB is an interactive simulation that allows users to explore the concept of electric potential and electric current, and how they are affected by various factors, such as the resistance of a conductor and the voltage applied to it. The simulation includes several different modules, each of which focuses on a specific aspect of electricity.
-
25
🍎🔌⚡💡🥽 LAB: DC Direct Current Circuit Construction Kit Virtual
Circuit Construction Kit: DC Virtual Lab is an interactive simulation that allows users to explore the behavior of electric circuits and how they function. The simulation includes several different modules, each of which focuses on a specific aspect of electric circuits.
-
26
🍎🔌⚡🎧🔑💡 Direct Current Resistors, Batteries, Serial and Parallel Circuits
DC Direct Current resistors and batteries are important components in the field of electricity and are used in a variety of practical applications. In this lesson, we will explore the basic principles of DC resistors and batteries and how they work.
-
27
🍎🔌⚡🎧🔑💡 Voltage, Electric Energy, and Capacitors
In this lesson, you will learn the basics of voltage, electric energy, capacitors, electric potential, and electric dipoles, and how they relate to each other.
-
28
🍎🔌⚡🎧 Capacitors explained, Kirchhoff, KCL and KVL
Capacitors and Kirchhoff's laws are important concepts in the field of electricity and are used to analyze and understand the behavior of circuits. In this lesson, we will explore the basic principles of capacitors and Kirchhoff's laws and how they are used to analyze DC circuits.
-
29
🍎🔌⚡💡🥽 LAB: Basics Capacitor – Parallel Plate Capacitor Capacitance RC Circuit Circuits
Capacitor Lab: Basics is an interactive simulation that allows users to explore the concept of capacitors and how they function in electronic circuits. The simulation includes several different modules, each of which focuses on a specific aspect of capacitors.
-
30
🔌⚡💡🥽 LAB: Resistance in a Electric-Wire Resistivity Resistance Circuits
Resistance in a Wire is an interactive simulation that allows users to explore the concept of electrical resistance and how it is affected by various factors, such as the material of a conductor and the cross-sectional area of the conductor. The simulation includes several different modules, each of which focuses on a specific aspect of electricity.
-
31
⚡🧰🎲🥼🎧 Understanding Circuit Analysis and Ammeter and TinkerCAD Circuits activity
Circuit analysis is the study of how electric current flows through an electrical circuit. It involves analyzing the circuit to determine the current, voltage, and resistance at various points in the circuit. Circuit analysis is a fundamental concept in electrical engineering and is used to design and troubleshoot electrical systems and devices.
-
32
🍎🔌⚡🎧 Alternating Currents AC Circuits, Impedance, frequency and Hertz
In an AC circuit, the flow of electric current periodically reverses direction. This is in contrast to a DC circuit, where the current flows in only one direction. AC circuits are used in a variety of applications, including in the distribution of electrical power and in electronic circuits.
-
33
🍎🔌💡🥽 LAB: AC Alternating Currents Circuit Construction Kit
The Circuit Construction Kit AC Virtual Lab is a simulation tool that allows users to design and test their own electrical circuits. This simulation can be a useful resource for learning about electrical circuits and how they work. Here is a lesson on the Circuit Construction Kit AC Virtual Lab, along with some ideas for activities to do to learn more about electrical circuits.
-
34
⚡🎧🔑💡 How Electricity Work: Atoms, Conductors and Insulators, Electric Current, Voltage and Resistance
Electricity is a vital part of our daily lives, powering everything from our homes to our handheld devices. But how does electricity work? In this lesson, we will explore the basic principles of electricity and how it is transmitted from one point to another.
-
35
⚡🎧🔑💡 Electric Current AC/DC, basic Electronic components and their functions
In this lesson, we will learn about the various components that are used in electronic circuits and devices. Electricity is the flow of electric charge through a conductor, such as a wire. Electric current is a measure of the flow of electric charge through a conductor, typically measured in amperes (amps). There are two main types of electric current: direct current (DC) and alternating current (AC). Direct current flows in only one direction, while alternating current periodically changes direction. Understanding the different types of electronic components and their functions is essential for building and troubleshooting electronic circuits. We will explore the various components and their functions, including ammeters, multimeters, power monitors, GFCIs and RCD, circuit breakers, fuses, resistors, capacitors, diodes, transistors, inductors, LEDs, switches, and potentiometers.
-
36
⚡🎧 Voltage the electricity potential difference AC/DC
Voltage is a key factor in the functioning of electric circuits and is essential for understanding how electric current and power are transmitted. By understanding and manipulating the factors that affect voltage, it is possible to design and build effective electric circuits and devices.
-
37
⚡🎧 Breadboard the prototyping board used in electronics to build and test circuits without soldering
A breadboard is a type of prototyping board that is commonly used in electronics to build and test circuits. It consists of a plastic board with a grid of holes, which are used to hold electronic components in place and make connections between them. Breadboards are a popular choice for prototyping because they allow users to easily connect and disconnect components without the need for soldering.
-
38
⚡🎧 LED How they work and the anode -cathode
An LED, or light-emitting diode, is a type of semiconductor device that converts electrical energy into visible light. LED technology has been around for several decades, and it has become increasingly popular due to its energy efficiency, long lifespan, and versatility in a variety of applications.
-
39
⚡🎧 Resistors to reduce the flow of electrical current and color code
-
40
⚡🎧💡 Basic components and features of TinkerCAD circuits, and learn how to build and troubleshoot simple circuits
-
41
⚡🎧💡 Transistors to control high-power devices such as motors
A transistor is a type of electronic device that can be used to amplify or switch electronic signals. It is made up of three layers of semiconductor material, which allows it to control the flow of current between two circuits. Transistors can be used in a variety of applications, including amplifiers, switches, and voltage regulators.
-
42
⚡ Introduction to input and output in Arduino
In Arduino, input and output (I/O) refer to the communication between the Arduino board and the outside world through its input and output pins. The Arduino has a number of digital and analog input and output pins that can be used to read data from sensors and control devices such as LEDs, motors, and more.
-
43
⚡📎 Arduino UNO Pinout Diagram
-
44
⚡ Sensors for your projects and prototypes
There are many different types of sensors available for use with the Arduino microcontroller, including temperature sensors, humidity sensors, and proximity sensors. These sensors allow the Arduino to detect and measure various physical properties, such as temperature, humidity, and distance and can be used in a wide range of applications, from home automation to robotics.
-
45
⚡🔋🎧💡 Batteries, how they work, type and size
Batteries are an essential part of our daily lives, powering everything from our phones and laptops to our cars and even our homes. In this lesson, we will take a deep dive into the inner workings of batteries, including how they store energy and convert it into electrical power when we need it. We will also discuss the different types of batteries and their characteristics, as well as the importance of responsible disposal and recycling of batteries. Whether you are a student, a DIY enthusiast, or just curious about how these everyday devices work, this lesson will provide you with a comprehensive understanding of batteries and their role in our world.
-
46
⚡🎧💡 How DC SERIES circuits work, voltage, current, resistance, power consumption and using a multimeter
In this lesson, we will be exploring the basic principles of DC series circuits, including voltage, current, resistance, and power consumption. We will also be looking at how to use a multimeter to measure these quantities in a circuit. By the end of this lesson, you will have a solid understanding of how DC series circuits work and how to use a multimeter to measure their characteristics.
-
47
⚡🎧 How DC PARALLEL circuits work, voltage, current, resistance, power consumption
In this lesson, we will learn how DC parallel circuits work, and we will explore the concepts of voltage, current, resistance, and power consumption. We will also work through some examples to help you understand and apply these concepts. A parallel circuit is a type of electric circuit in which the components are connected such that the current can flow through them independently. In a parallel circuit, the voltage across each component is the same, but the current through each component can be different.
-
48
⚡🎧 How DIODES work, where and why they are used, different types, and convert AC to DC
Diodes are electronic components that allow current to flow in only one direction. They are used in a variety of applications, including power rectification, voltage regulation, and signal processing. There are several types of diodes, including standard diodes, Zener diodes, and LEDs. Half and full bridge rectifiers are circuits that use diodes to convert AC to DC. Understanding how diodes work and the different types and applications of diodes is important for anyone working with electric circuits and devices.
-
49
⚡🎧 RELAYS electrically operated switch and their various applications
A relay is an electrical component that allows a low-power circuit to control a higher-power circuit by using an electromagnet to open and close a switch. In this lesson, we will delve into the inner workings of a relay and learn about the different types of relays, their applications, and the benefits they provide. By the end of this lesson, you will have a solid understanding of how relays function and how they are used in a variety of settings.
-
50
🆕⚡🎧 MOSFET a type of transistor that can be used as a switch or an amplifier
MOSFET is a versatile electronic component that is widely used in a variety of applications due to its high input impedance, low output impedance, fast switching speed, low power consumption, and high voltage operation. In this lesson, we have explored the basic working principle of MOSFET, its types, characteristics, and applications. By understanding these concepts, you can design and build electronic circuits that use MOSFET effectively and efficiently.
-
51
⚡📐🥼🎧 Ohm’s Law applied to circuit design.
In this lesson, we will explore the concept of series and parallel circuits and how to use Ohm's law to calculate the resistance needed to power a diode. Ohm's law is a fundamental principle in electronics that describes the relationship between voltage, current, and resistance. It is often used to calculate the resistance needed in a circuit to achieve a desired voltage and current.
-
52
⚡📐🎲🥼🎧 Circuit Symbols and Diagrams. Create
Circuit symbols and diagrams are a fundamental part of the field of electronics, used to represent the various components and connections that make up an electronic circuit. Understanding these symbols and how to interpret circuit diagrams is essential for anyone working with electronics, as it allows them to understand the function and behavior of a circuit and troubleshoot any issues that may arise. In this text, we will cover the basics of circuit symbols and diagrams, including how to create and download a circuit schematic in Tinkercad, a popular online tool for prototyping and designing electronic circuits. We will also discuss the various symbols used to represent different components in a circuit and the process of reading and analyzing circuit diagrams.
-
53
⚡🧰🎧💡 Electric-Wire type
A wire stripper and cutter is a tool that is used to strip the insulation off of the electrical wire and cut the wire to a desired length. Wire strippers and cutters are typically used in electrical and electronic applications, such as wiring a house or building an electronic circuit.
-
54
⚡🧰 Pliers, Tweezers and hand tools used to grip and manipulate objects
Pliers, tweezers, and other hand tools are useful and important tools that are used to grip and manipulate small objects and components in a variety of applications. These tools are widely used by electricians, electronics technicians, jewelers, and other professionals who need to work with small objects and components.
-
55
⚡🧰🎧 Multimeter to measure electrical quantities such as voltage, current, and resistance
A multimeter is a device that is used to measure electrical quantities, such as voltage, current, and resistance. Multimeters are commonly used in a variety of applications, including electrical and electronic troubleshooting, maintenance, and repair.
-
56
⚡🧰🎧 What is an digital Oscilloscope,and how to simulate one in TinkerCAD Circuits
An oscilloscope is a type of electronic instrument that is used to display and analyze electrical signals. It is commonly used to visualize, measure, and analyze the characteristics of electrical and electronic signals, such as voltage, current, and frequency.
-
57
⚡🧰🎧💡 Soldering iron, solder and some tips and advice for soldering
A Soldering iron and solder are important tools that are used to join metal items together by melting and flowing solder into the gap between the items. These tools are widely used in a variety of applications, including electronics, engineering, and robotics.
-
58
⚡🧰🎲🥼 TinkerCAD Simulated Function Generator and the Oscilloscope instruments activity
A function generator is a type of electronic instrument that can be used to generate various types of electrical signals. It is a valuable tool for testing and debugging electronic circuits, as it allows you to simulate different input signals and observe the response of the circuit.
-
59
🎲⚡ Simulating digital and analog inputs and outputs in Tinkercad
-
60
🎲⚡ Using pulse width modulation to control the intensity of LEDs and motors
Pulse width modulation (PWM) is a technique used to control the intensity of LEDs and the speed of motors by rapidly turning them on and off at a high frequency. By adjusting the duty cycle (the amount of time the LED or motor is on versus off), you can control the average intensity or speed of the LED or motor.
-
61
🎲⚡🎧🚨 the Power and Current Limits of Arduino Microcontrollers and the Limitations of the Tinkercad Simulator
In this lesson, we will discuss the power and current limits of Arduino microcontrollers and the limitations of the Tinkercad simulator in accurately simulating these limits.
-
62
🎲⚡🎧 First Circuit Arduino Breadboard, zoom, center and how to create wired connections
In this lesson, we will learn how to create a new circuit, add an Arduino and a breadboard, change the code editor to text-only, and connect the breadboard power buses to the Arduino's 5V and GND pins.
-
63
🎲⚡🎧 File management, duplicate projects and using LED
In this lesson, we will learn how to duplicate a project, connect LEDs in Tinkercad Circuits, and understand the basic principles of file management in Tinkercad. In Tinkercad, you can use LEDs to create circuits that include lighting effects or other visual indicators. To do this, you will need to add LED components to your circuit and connect them to your breadboard or other components using wires.
-
64
🎲⚡🎧 How to use Pushbuttons (switches) to control the flow of electricity in a circuit
In this lesson, we will learn about using push buttons with Arduino in Tinkercad. Push buttons, also known as switches, are electronic components that can be used to control the flow of electricity in a circuit. They are typically used to turn devices on and off, or to trigger some action when pressed.
-
65
🎲⚡🎧💻 Using the Serial monitor tool to view and send data to the Arduino board
In this lesson, you will learn how to use the serial monitor in Tinkercad to communicate with an Arduino board. To use the serial monitor in Tinkercad, you will need to have an Arduino circuit set up in the Tinkercad Circuit Editor. Once you have your circuit set up, you can open the serial monitor by clicking on the "serial monitor" icon in the top right corner of the Circuit Editor.
-
66
🎲⚡🎧💻 Wiring a light sensor photo resistor, to an Arduino in TinkerCAD and check the serial monitor
Welcome to this lesson on using an Arduino in TinkerCAD! In this lesson, we will be learning how to wire a light sensor, specifically a photoresistor, to the Arduino to provide readings. We will go over the circuit design and the necessary code to make this project work, as well as discuss some common pitfalls to avoid. Whether you are new to Arduino and TinkerCAD or have some experience with them, this lesson will provide you with the knowledge and skills you need to get started with this project.
-
67
🎲⚡🎧💻 The IF ELSE condition statement for an Arduino night light using a photocell
In this upgraded project, we will be using a photocell to detect the ambient light level and turn on an LED when the light level drops below a certain threshold. We will also be using "if" statements in our code to control the behavior of the LED.
-
68
🎲⚡🎧💻💡 Simple Blinking an LED TinkerCAD Circuits Arduino Projects
Blinking an LED with Arduino in Tinkercad Circuits is a simple and popular project for beginners to learn about programming and electronics.
-
69
🎲⚡🎧💻💡 Multiple LEDs TinkerCAD Circuits Arduino Projects
In this lesson, you will learn how to use multiple LEDs and breadboards with Arduino and Tinkercad. A breadboard is a prototyping tool that allows you to easily connect electronic components together without the need for soldering. It is a useful tool for building and testing circuits, and it is often used in conjunction with Arduino and other microcontrollers
-
70
🎲⚡🎧💻💡 Fading LED TinkerCAD Circuits Arduino Projects
In this lesson, you will learn how to use Tinkercad, a free online software, to simulate and program circuits with an Arduino microcontroller. By the end of this lesson, you will be able to create a fading LED circuit and write a program to control its brightness. You will also learn about pulse width modulation (PWM) and how it can be used to control the perceived brightness of an LED
-
71
🎲⚡🎧💻💡 RGB LEDs TinkerCAD Circuits Arduino Projects
In this lesson, you will learn how to use Arduino Tinkercad to control the color of an RGB LED. You will also learn about the primary colors of light and how they can be mixed to create almost any color. By the end of this lesson, you will be able to create a simple light show with an RGB LED and write a program to control its color
-
72
🎲⚡🎧💻💡 Push button Digital Input TinkerCAD Circuits Arduino Projects
In this lesson, we will be building a circuit and writing a program to read the button and control a single LED. If you are following along with physical components, you will need an Arduino Uno board and a USB cable, a breadboard, a pushbutton, LED, resistors, and breadboard wires.
-
73
🎲⚡🎧💻💡 Potentiometer Analog Input TinkerCAD Circuits Arduino Projects
In this lesson, we will be building a circuit and writing a program to control the rate of a flashing LED based on the position of the potentiometer knob. If you are following along with physical components, you will need an Arduino Uno board and a USB cable, a breadboard, a potentiometer, an LED, a resistor, and breadboard wires.
-
74
🎲⚡🎧💡 How to connect a Solenoid Magnet to an Arduino using a transistor as a switch.
In this project, you will learn how to control a solenoid magnet with an Arduino using a transistor as a switch. A solenoid is an electromagnetic coil that creates a magnetic field when current is passed through it. Solenoids are commonly used to control mechanical devices such as valves, door locks, and motors.
-
75
🎲⚡📎💻 What is the Atmel ATmega328P and the technical datasheet
The ATmega328P datasheet is an important resource for anyone working with this microcontroller, as it provides detailed information about its features and operation. It is essential for understanding how to use the microcontroller
-
76
🎲⚡🎧💻 How to use software while loop, DDR
In this lesson, we will learn how to use software to control an LED with an Arduino in Tinkercad. To do this, we will use two special registers called DDR and PORT. These registers are locations in the processor's memory where we can set individual bits to 1 or 0. They are used to set a pin as an input or output and to set it high or low if it is set as an output.
-
77
🎲⚡🎧💻 Logic state of an INPUT pin on an Arduino, Pull-up
Pull-up and pull-down resistors are used to define the logic state of an input pin on the Arduino when the pin is not connected to anything else. This can be useful when working with buttons or switches, or in situations where the input pin may be susceptible to electrical noise or fluctuations. By using pull-up and pull-down resistors, we can ensure that the input pin has a defined logic state and that our code can accurately detect and respond to changes in the state of the input pin.
-
78
🎲⚡🎧💻 External Interrupts to execute a specific code in response to a change on a digital input pin
External interrupts allow an Arduino to interrupt the normal flow of its program and execute a specific piece of code in response to a change on a digital input pin. This can be useful for detecting button presses, where we want the Arduino to respond immediately to a change on the input pin rather than waiting for the next iteration of the main loop to check the state of the input pin.
-
79
🎲⚡🎧💻 Using pin change interrupts, set up the PCICR (Pin Change Interrupt Control Register) and PCMSK (Pin Change Mask Register) registers
Pin change interrupts are a type of interrupt that can be used on the Arduino to monitor changes on digital input pins. They are similar to external interrupts, but they have some differences in their functionality and use different registers to control them.
-
80
🎲⚡🎧💻 Using timers and counters to schedule tasks
Timers and timer interrupts are powerful and versatile features of the Atmega328p and can be used to perform a wide range of tasks in your Arduino projects. Whether you are blinking an LED, measuring the speed of a motor, or simply keeping track of time, timers can help you get the job done. So, it is very important to learn about timers for the Atmega328p microcontroller if you are working with Arduino projects.
-
81
🎲⚡🎧💻 Set up an output compare interrupt using a timer
Timers are useful for generating interrupts at a set frequency. In this lesson, we will learn how to use the Output Compare (OC) registers and the TImsk register to set up an output compare interrupt on the Atmega328p.
-
82
🎲⚡🎧💻 Measure duration pulse using timers and pin change interrupts
In this lesson, we will delve into the topic of using timers and pin change interrupts to measure the duration of an external pulse on an Atmega328p microcontroller. Timers are a useful tool in microcontroller programming, as they allow us to perform actions at set intervals or to measure the elapsed time between two events. Pin change interrupts, on the other hand, allow us to detect changes in the state of an input pin, such as a rising or falling edge.
-
83
⚡💻 Arduino Creating custom functions and libraries
In Arduino, you can create custom functions to reuse code and make your sketches more organized and easier to read. To create a custom function, you will need to use the void keyword, followed by the name of the function and a set of parentheses.
-
84
⚡💻 Arduino Working with libraries and external resources
In Arduino, you can use libraries to extend the functionality of the Arduino language and make it easier to work with certain devices or perform certain tasks. Libraries are collections of code that provide additional functionality beyond what is available in the Arduino core.
-
85
⚡💻 Arduino Using EEPROM to store data on the board
EEPROM stands for Electrically Erasable Programmable Read-Only Memory. It is a type of non-volatile memory that can be used to store data that needs to be retained when the power is turned off. On the Arduino, the EEPROM library allows you to read and write data to the board's internal EEPROM.
-
86
🎲⚡🎧💻💡 How to use a PIR (passive infrared) sensor to control a motor using an Arduino microcontroller
In this lesson, we will learn how to use a PIR (passive infrared) sensor to control a motor using an Arduino microcontroller. The PIR sensor is a type of motion detector that uses infrared light to detect movement. We can use the output from the PIR sensor to trigger a pin change interrupt on the Arduino, which will then control the motor through a transistor.
-
87
🎲⚡🎧💻 PWM and H-Bridge L293C for bidirectional DC motor control for Robot steering algorithm on TinkerCAD
To create a basic left/right obstacle-avoiding steering algorithm for a robot using an H-bridge and two switches used as bump sensors. An H-bridge is a circuit that allows a voltage to be applied across a load in either direction. It is called an H-bridge because it typically consists of four transistors arranged in an "H" shape. Pulse width modulation (PWM) is a technique used to control the average value of an analog signal using digital signals. It works by rapidly switching a digital signal on and off, and varying the proportion of time that the signal is on (also known as the duty cycle).
-
88
🆕🦾⚡🎧 What are PLC and use in Mechatronics and Robotics
A Programmable Logic Controller (PLC) is a type of industrial computer control system that is used to monitor and control various machines and processes in an industrial or commercial setting. PLCs are designed to be rugged and reliable, able to withstand the harsh environments found in many industrial settings. They are also highly flexible and configurable, able to be programmed to perform a wide range of tasks and functions.
-
89
🆕🦾⚡🎧 Arduino PRO PLC and the IEC 61131-3 standard languages
The Arduino PRO is a series of microcontroller boards that are designed specifically for use in industrial applications and support the IEC 61131-3 standard languages for programming industrial control systems. This makes them an attractive option for developers who are familiar with these languages and want to use them to build control systems with the Arduino platform.
-
94
🔴 Developing a weather station using sensors and a display
-
95
🔴 Creating a home automation system using relays and a remote control
-
96
🔴 Building a robotic arm using servo motors and control buttons
-
97
🔴 Designing and programming an interactive game or art installation
-
98
🔴 Using Arduino in Internet of Things (IoT) applications